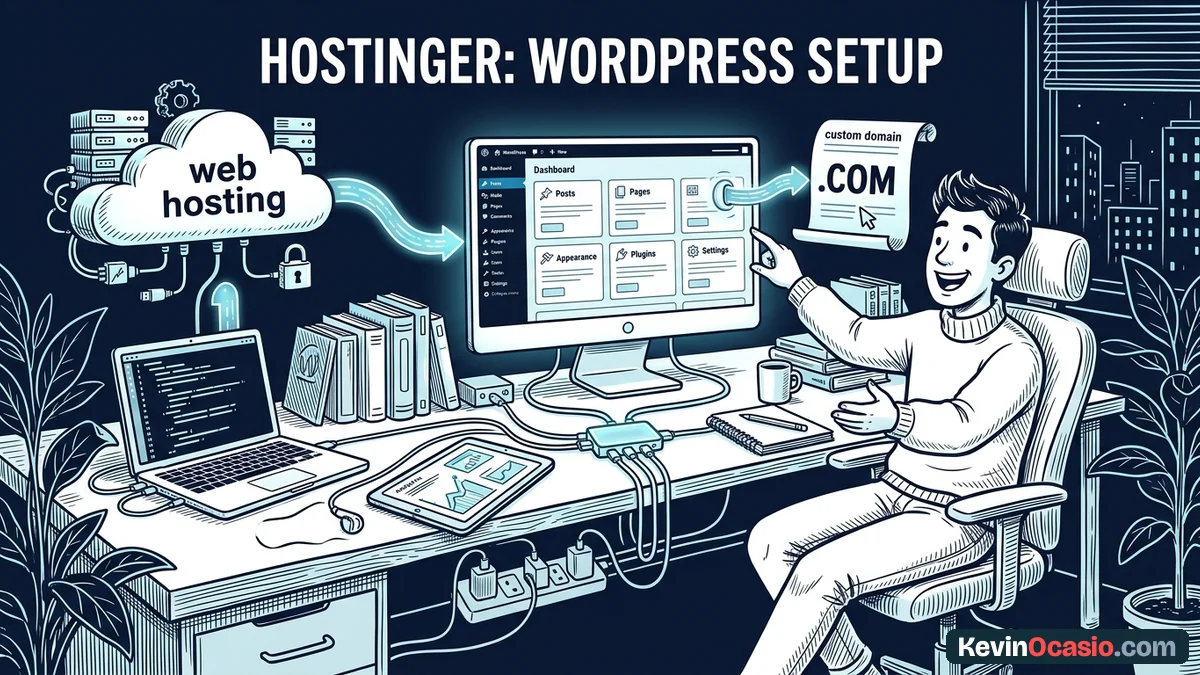
You don’t need to spend weeks looking at expensive website tools before writing a single word. You can set up a fast WordPress blog on Hostinger in twenty minutes. It costs less than three dollars a month.
The Short Version
- Pick the right hosting tier so you get a free domain, auto-installer, and security tools without extra fees.
- Run the clean auto-installer inside hPanel to set up your site database and admin login in under a minute.
- Launch your clean blog dashboard with built-in server caching so you can focus on writing good content.
Jump to Section
- Choosing Between the Premium and Business Plan
- Claiming Your Domain and Setting Up DNS
- How to Start a WordPress Blog on Hostinger Using the Auto-Installer
- Turning on Free SSL and Checking LiteSpeed Server Caching
- Launching Your First Post in the Clean WordPress Dashboard
- Frequently Asked Questions About Starting a WordPress Blog on Hostinger
Choosing Between the Premium and Business Plan
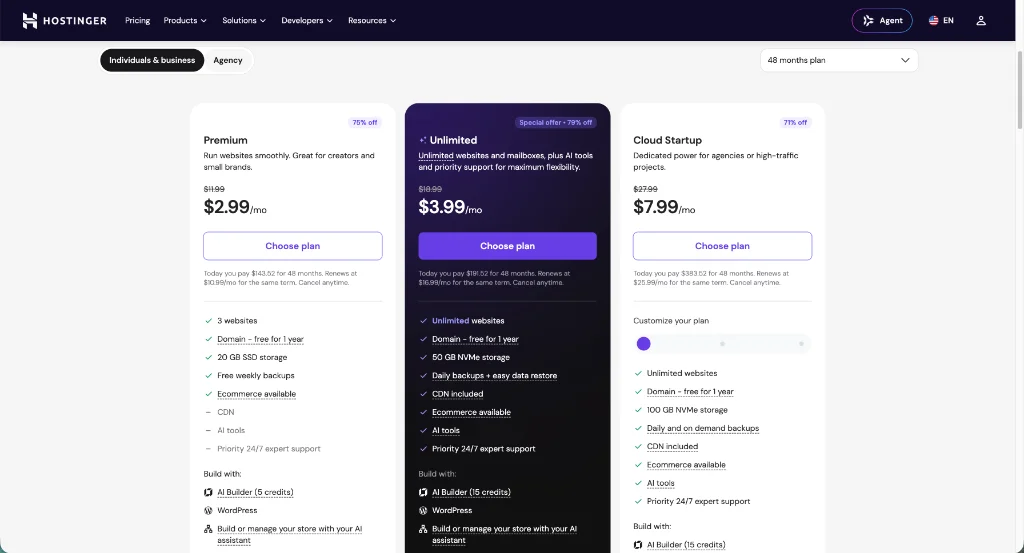
When you sign up for hosting, companies love throwing extra plans at your cart. Hostinger keeps things simple. That’s why it offers two main shared hosting tiers that work well for a new blog.
The Premium plan starts at $2.99 a month on a four-year term. It renews at $10.99 a month. You get room for three websites, twenty gigabytes of disk space, weekly backups, and a free domain for your first year.
If you want faster drive speeds and daily restore points, the Business tier costs $3.99 a month. It steps up to $16.99 a month upon renewal. That tier gives you fifty gigabytes of NVMe storage space and automated daily backups.
I usually tell people starting out to pick Premium on Hostinger. Twenty gigabytes gives you plenty of room for hundreds of blog posts and images. You can easily switch to the higher tier later with two clicks inside your dashboard.
Here’s how both tiers stack up on real costs and features against typical high-priced web hosts.
| Plan Feature | Hostinger Premium | Hostinger Business | Overpriced Competitors |
|---|---|---|---|
| Starting Monthly Price | $2.99/mo (48 months) | $3.99/mo (48 months) | $12.99 – $29.99/mo |
| Renewal Rate | $10.99/mo | $16.99/mo | $19.99 – $44.99/mo |
| Storage Space | 20 GB SSD | 50 GB NVMe SSD | 10 GB – 20 GB |
| Automated Backups | Free Weekly | Free Daily | Paid Add-on ($3 – $5/mo) |
| Custom Domain | Free for 1 Year | Free for 1 Year | Paid Extra ($15 – $20/yr) |
| Free Security Certificate | Included (Unlimited) | Included (Unlimited) | Sometimes Paid Add-on |
Claiming Your Domain and Setting Up DNS
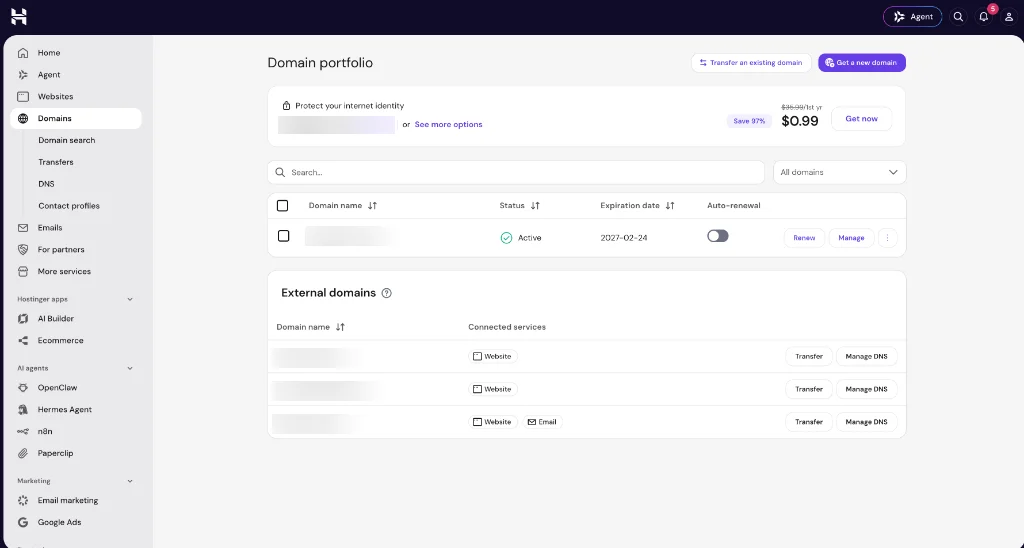
You need a clean web address that readers can remember easily. Both tiers include a free domain voucher for your first twelve months. That perk saves you fifteen dollars right out of the gate.
Search for a simple dot-com name that fits your topic. Try to keep it under three words. Don’t use hyphens, numbers, or odd spellings that confuse people when they type your link on a phone.
If you already bought your domain name elsewhere, you don’t need to pay transfer fees. You can keep your name where it lives right now. Just point your nameservers to Hostinger, or route an A record to your new server.
Setting up your domain properly lays the base for your entire site. In my guide on how to start a blog, I show why owning your web address gives you full control over your business.
How to Start a WordPress Blog on Hostinger Using the Auto-Installer
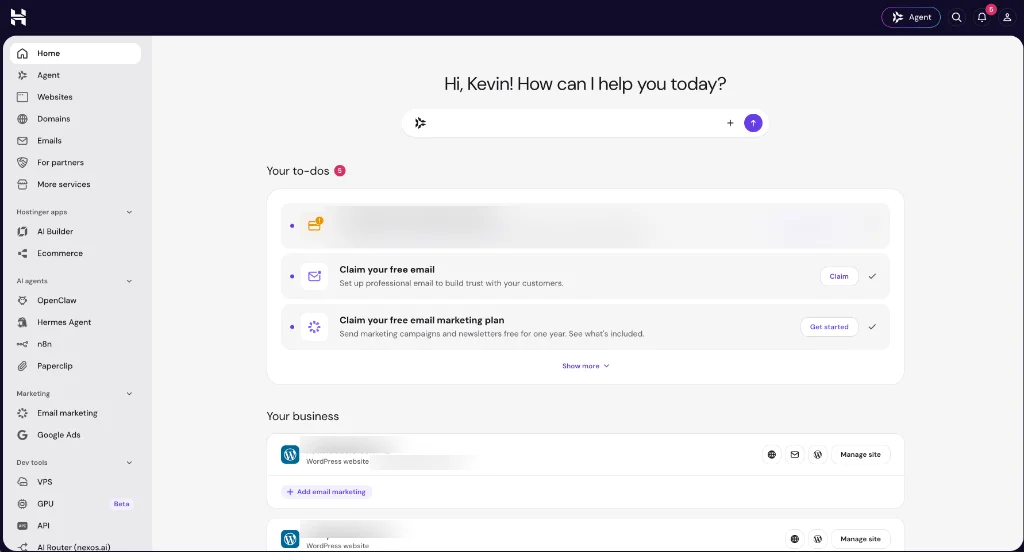
Once your plan and domain are active, log into your main hPanel screen. Hostinger built its own custom control panel instead of using clunky legacy tools. It’s built to make finding your settings fast and painless.
Click on Websites in the top bar. Select your domain name, and find the Auto-Installer icon on your screen. You’ll see WordPress listed as the top choice right away.
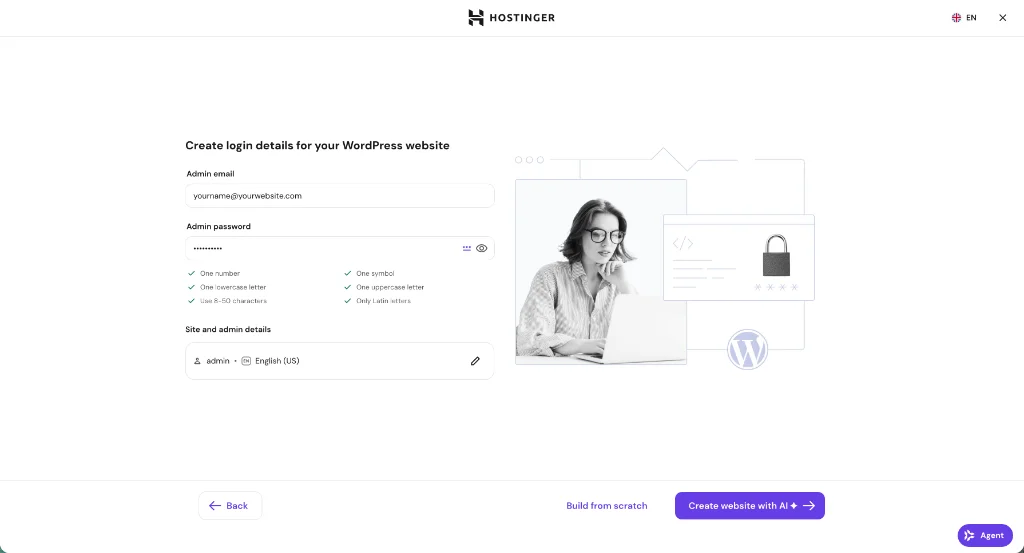
Choose WordPress to open the quick setup box. Type in your website title and your active email address. Then pick an admin username and a strong password.
Never use the word admin as your username. Automated bots try guessing that name all day on fresh sites. Pick a unique username that only you know, along with a strong password.
Hostinger will ask if you want to add starter themes or popular plugins during this step. Skip all of those optional check boxes. That’s how you keep your fresh site lean, fast, and free of clutter.
Hit the Install button and wait about thirty seconds. The server builds your database and loads your files automatically. If you want a deeper look at server performance and plan limits, read my breakdown of Hostinger.
Turning on Free SSL and Checking LiteSpeed Server Caching
Security and speed are the two main things that keep visitors from leaving your site. Before you post your first article, you want to make sure your site has active encryption and fast page delivery.
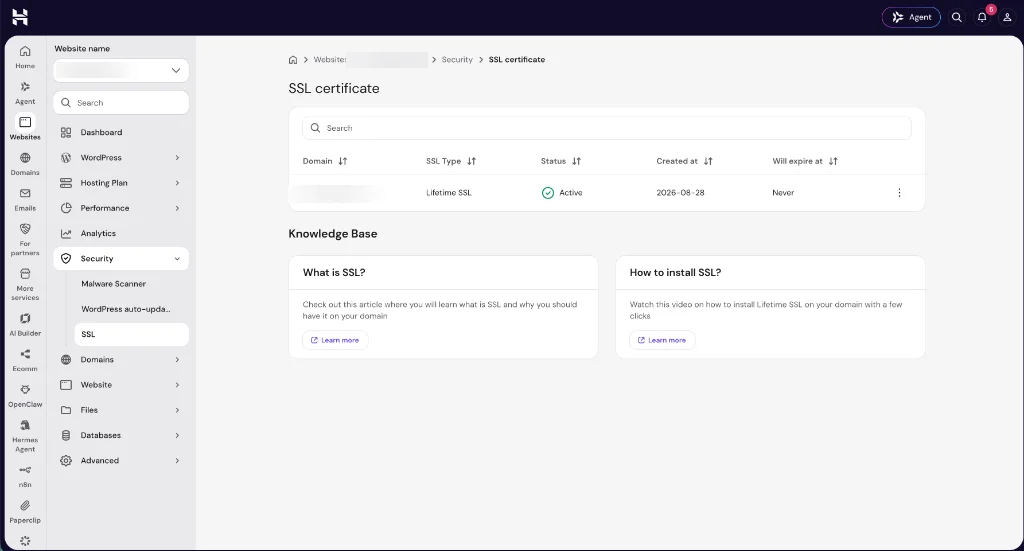
Head to the Security area in your hPanel dashboard and click on SSL. Hostinger sets up a free lifetime certificate for your domain. Visitors will see the secure lock icon in their browser.
Turn on the toggle switch that says Force HTTPS. That’s the setting that pushes all visitor traffic across a secure connection automatically. If your domain is new, give your records a few minutes to update before checking the lock.
Now open the Cache Manager under the Advanced menu in hPanel. Flip the Automatic Cache switch to active. Hostinger runs on fast LiteSpeed servers that store saved copies in memory, so your site doesn’t have to rebuild pages on every visit.
Smart caching helps reduce server response time down to a fraction of a second. That’s what keeps your mobile readers happy and helps your pages rank higher in search.
Launching Your First Post in the Clean WordPress Dashboard
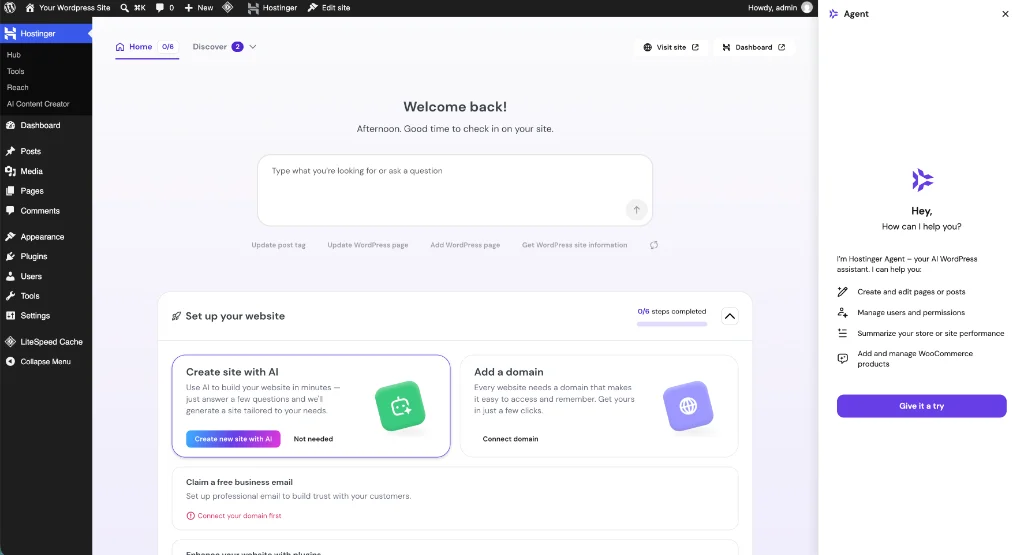
Now that your hosting, domain, security, and cache are set up, you can log into your blog. Type yourdomain.com/wp-admin into your browser bar. Log in using the admin details you created a few minutes ago.
Your screen will show a clean WordPress dashboard ready for work. Delete the default sample post and comment right away. It’s a good habit that keeps your database clean from day one.
Go to Settings and click on Permalinks. Set your link structure to Post Name. That’s what makes your article links look clean and easy to read instead of showing random numbers and question marks.
There’s a few small tweaks you’ll want to make before publishing your first article. Check out my guide on the first settings to change after installing WordPress to finish setting up your comments, search visibility, and reading options.
Once those quick settings are done, your blog is live and ready for readers. Open the Posts menu, click Add New, and start writing your very first helpful article.
Frequently Asked Questions About Starting a WordPress Blog on Hostinger
Can I start a WordPress blog on Hostinger with zero technical experience?
Yes, you can launch a site easily without writing any code. Hostinger includes a one-click installer that sets up your database, site files, and admin login in less than a minute.
Which Hostinger plan is best for a brand-new blog?
The Premium plan gives you everything you need to start. It includes twenty gigabytes of fast storage, room for three sites, weekly backups, and a free domain for a year at a low price.
Does Hostinger charge extra for an SSL certificate or domain name?
No, you don’t pay extra for basic security or your first domain. Hostinger includes a free domain voucher for your first year along with security certificates across all your sites.
How long does it take for a new WordPress blog to go live on Hostinger?
The software setup takes about thirty seconds to finish. If you register a new domain name during checkout, it usually goes live across the web within fifteen to thirty minutes.
Can I move my WordPress site away from Hostinger later if I want to?
Yes, self-hosted WordPress gives you full ownership of your site so you’re never locked in. You can export your posts, images, and database whenever you want and move your site to any host you like.